
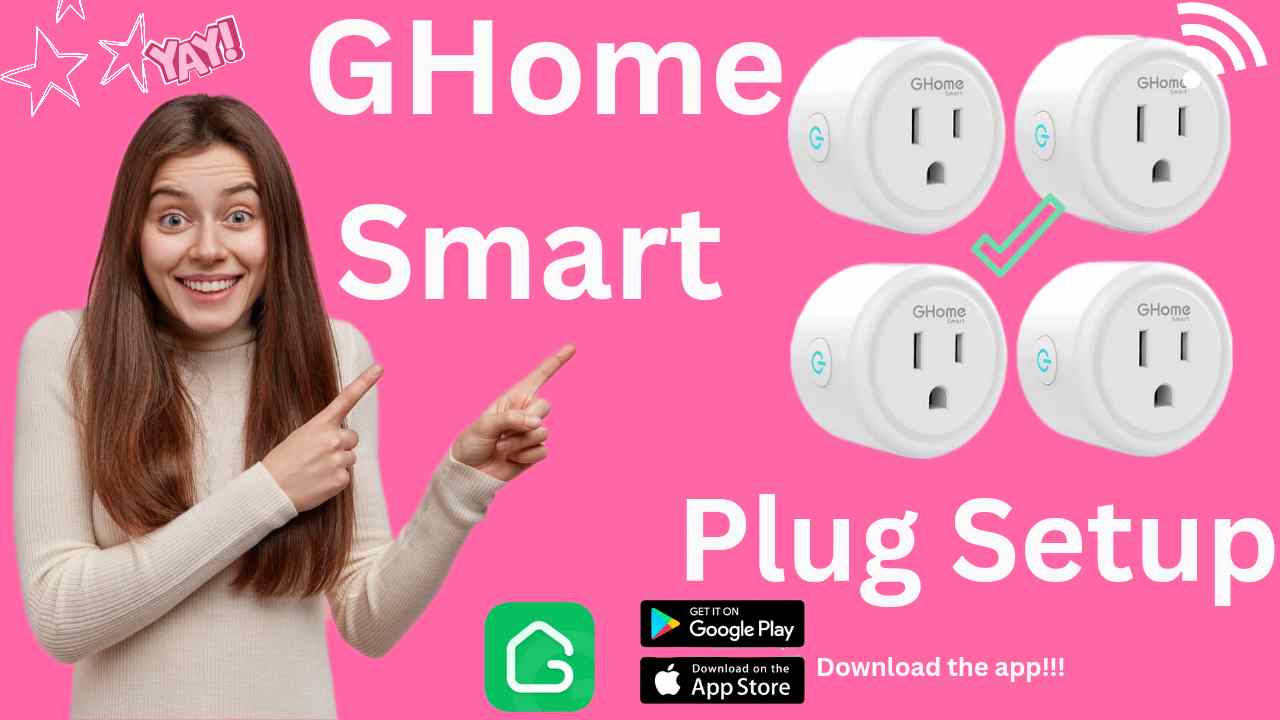
Smart plugs help us to control or manage our products easily without us manually turning them On/Off each time. So, let’s learn how to set up a New Ghome Smart Mini Plug with the help of its “Gosund” App.
Before we start the setup make sure you have working Internet at home. Plus you will need to download the app on your Android or iOS device and then login or sign up accordingly. You can click here to download the app too.
![]()
![]()
Now, it is really important during the setup that the Ghome smart plug is not connected too far away from the router. In case your smart plug gets disconnected again and again due to Wifi range issues. Then we recommend you to setup Wifi Range Extender with your smart plug to tackle that. In case you live in remote area with poor router speed. Then you can opt for Starlink Internet, as their speeds are pretty decent.
Nevertheless, let’s start Ghome smart plug setup process-
Connecting Ghome Smart Plug to My Wifi
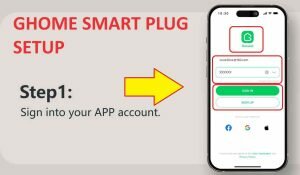
We assume you have already downloaded the app from the above mentioned link. Or you can also download it by scanning the QR code available with your Ghome Plug Manual. Moreover, you can set this plug up in two modes namely EZ and AP modes. Although the set up process remains the same for both. After downloading the app kindly create your account.
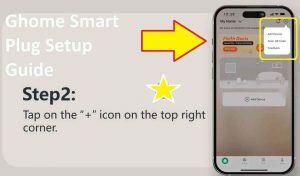
- After logging into the app click on the (+) icon on the top right hand corner.
- Click on Add a device.
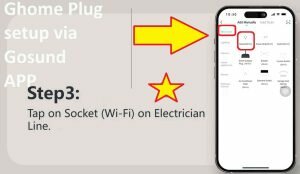
- Then in the “Electrician” menu, select Socket(Wi-fi) as your device.
- In the next window you will need to select your 2.4GHz network name. Plus type its password for confirmation.
- Now, you will be able to select EZ or AP mode from the top right hand corner.
- In case your plug light is blinking fast then click on next. Otherwise, press and hold the button on the plug for 5 seconds until you see a fast rapid blinking LED.

- Next, your app will detect the Ghome plug. This usually takes around 30 seconds. In case it doesn’t then unplug the smart plug and try the setup again.
- You will be able to rename your plug using a pencil icon. This will help you to identify it in the near future. Moreover you will be able to use voice commands using its name via Alexa or Google home.
Cool Features Of Ghome Plug You Can Use After Setup
After Ghome smart plug setup you can add Schedule and also add Timer too. You will be able to access all these functions using the Gosund App. Moreover, you will be able to create a group and control all the plugs at once.
On the top of that you can connect Ghome Plug to Alexa and also use Ghome Smart Plug with Google home too.
Why My Ghome Plug Is Not Connecting With the Internet?
Just in case you are trying the Ghome Smart Mini Plug setup and they are not working. Then follow the given below steps to resolve the issue-
- First and foremost make sure your plug is connected to an electrical outlet within the range of your router.
- Moreover before you start the setup the light on it should be blinking slowly.
- If not then press the button on your plug for around 5 seconds. To make the light start blinking.
- You can also try to uninstall the app and then reinstall it again.
- If still not working try the hard reset by pressing the button on the device for around 15-30 seconds. Make sure it is connected to the wall outlet during the whole time.