Most people don’t know that they can update the firmware of Netgear Wifi Router via four methods. And these are via Netgear genie, Nighthawk App, Routerlogin.net/Ip Address and Manually. So, lets learn each method.
But before that, we assume that you have already setup your Netgear Router. Also it should be plugged in into an electrical socket. Additionally with its power LED stable. Now, you can use your phone or computer to start the process. Also it is really important to connect your phone or computer to your router’s wifi network too before trying the update.
Moreover, firmware update is really important as it fixes many bugs and security loopholes.
First Method : Updating Netgear Router Firmware With Web Management Page
So, in this method we simply just need to first login into our Netgear web management page online.
- You can do that by going to your web browser.
- Next, type “routerlogin.net” into the url and hit enter to access its login page.
- There it will ask you for username and password. By default the username and password is “admin” and “password”, all lower case.
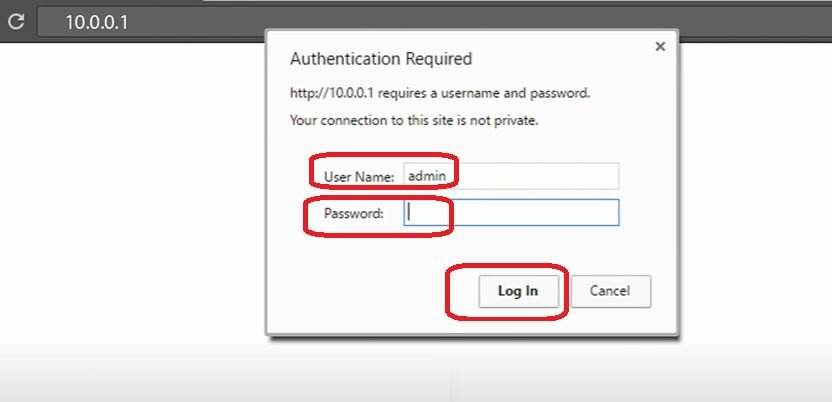
- If routerlogin.net is not working then try to router login via its IP address.
- Once you are into netgear router web interface then you will see a message right on the top of the screen. Saying “A new firmware Update is available”.
- If not then Click on “Advanced”>>”Administration”>>”Router Update”>>”Check”.
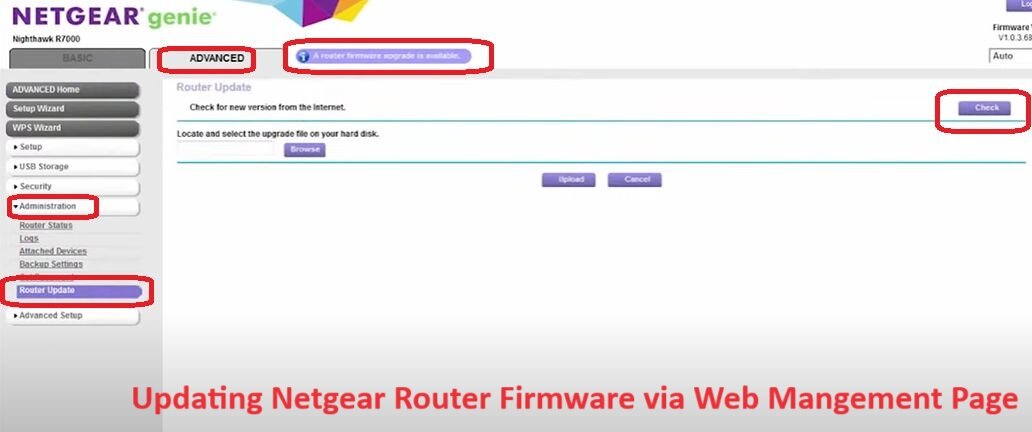
- It will then check for netgear router new firmware versions. And if found will give you an option to update it. You simply will just need to click on “Yes”.
- Next, the router reboots for around 120 seconds and you will be good to go after that.
Second Method: Updating Router Firmware Via Netgear Genie
So, for this method we will first need to install Netgear Genie Software on our windows or mac system. Click here to go to netgear genie download page. Then navigate to “Firmware and Software downloads” section and download and install the Genie software.
- Now, open the Netgear genie software.
- As you do that it will show you the newly available firmware update right on the top of the Genie. You can simply click on it to update the router firmware.
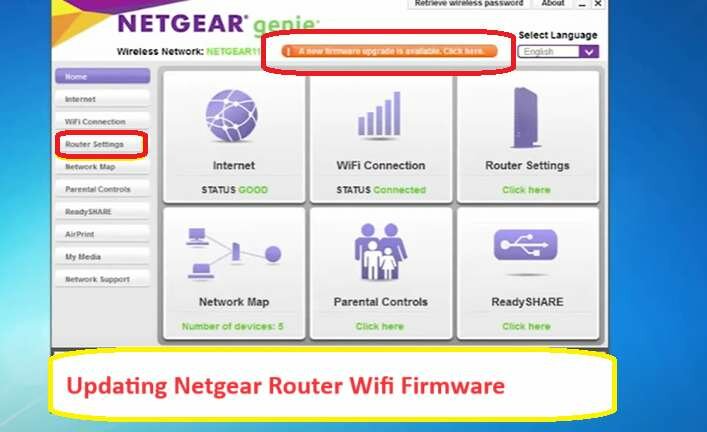
- Or else you can goto “Router Settings” options to access firmware update option.
- Netgear router firmware update will take several minutes to complete.
- Also, make sure you do not unplug or power off the router while its updating the firmware.
Third Method: Updating Firmware Through Nighthawk App
Now, this method is only supported by the latest Netgear nighthawk models. So do kindly check once if you router is support by this app. You can check if your netgear router is supported by nighthawk app here. On this page click on “Routers” to access the list of model numbers supported by the nighthawk app. So, if your router supports it then download the app.
- Click here to download for Android
- Download for iOS
- First and foremost make sure you phone or ipad is connected to your router’s wifi. You can do that by going to settings and then to wifi. There you simply just need to connect to your netgear router’s wifi network.
- Next, open the Nighthawk App. It will ask the first time users to login with username and password.
- On your Nighthawk App dashboard click on the Router image on the top once.
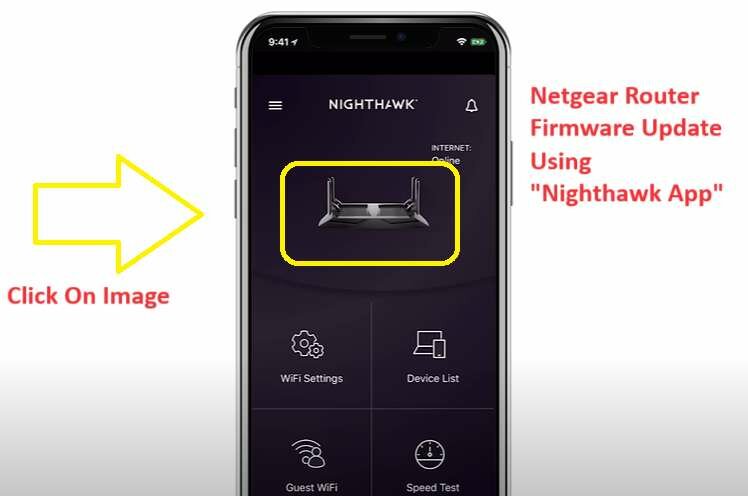
- Next, scroll down to the very bottom and click on “Check For Updates” option.
- If an update is found it will show you on the screen. You can click on “Update” option to start the process.
- Again it just takes couple of minutes for your wifi router to complete its software update. So, we recommend you, not to unplug the router or turn it off during this process.
Fourth Method : Manually Updating The Software
I have put this method at fourth number because it is bit difficult for few. The reason being you will need to download the software first, and then unzip it and then upload it to your router’s management page. So, lot of steps involved. Anyways I will be guiding you step by step to make it work. This method works best when your Netgear router’s firmware is corrupt. Most importantly your computer should be connected with ethernet cable to your router during this process. So let’s start.
- Firstly we will need to download the latest firmware from netgear’s support website.
- Next type your router’s model number that can be found on the back sticker of the router. Or you can also type product name and hit enter.
- It will show you two options next “Downloads and Documentation”. Click on Downloads.
- As you do that, under “Firmware and Software Downloads” section. It will show you the latest firmware version available. Click on it to download it.
- Once it downloads to your local system. Right click on the file and select the option which says “Unzip Files” Or “Unzip Here”.
- Next, open a browser and in the URL or address bar type “Routerlogin.net” and hit enter. If that doesn’t work then try to login via netgear router’s IP address.
- Type username and password next.
- Go to Advanced>>Administration>>Router Settings>>.
- Then select the option which says “Choose a file” or “Browse”. Now, select the firmware file from your local system. The file will end with .img or .chk extension.
- Click on “Upload” to complete the firmware update process.

